
Power Automate & My Daily Commute 🚗
How I used Power Automate to help me plan and coordinate my daily commute.

Since COVID-19, the "return to work" mandate has created a little bit of a hassle for me in the mornings. It seems everyone is back on the roads and heading into the office nowadays. Some days are worse than others, I mean, who wants to head into the office on a Monday or a Friday, those are reserved for working from home, right? But when it comes to the mid-week commute, it's an absolute nightmare.
Now, a personal struggle of mine is determining when is best to set off from home to reach the office on time, and gauging what the commute traffic looks like. I always forget to check my maps app on my phone, and I usually set off at the same time every morning, hoping the traffic is fine and I'll get to work on time.
This has stung me a couple of times.
So, I thought to myself, "I clearly always forget to check what the traffic is like, so how can I automate that?".
And I found my solution: Power Automate and Azure Maps.
How about I get Power Automate to check my calendar every day at 7.30am, check to see if I'm in the office that day based on the events in my calendar, query the Azure Maps API to get the duration and estimated arrival time for my commute from home to the office, and then send me a notification with the results. I don't even have to lift a finger, and I know what traffic is like before I've even thought about setting off.
Well, here's how I did it.
Tutorial
There's a couple of pre-requisites to this tutorial:
- You'll need an active Azure subscription.
- Don't worry, Azure Maps doesn't cost a thing for the purpose we're using it for... providing you stay within the free limits. https://azure.microsoft.com/en-us/pricing/details/azure-maps/.
- A Power Automate premium subscription.
- We're going to need to create a custom connector for this, therefore a free subscription (or one bundled with Microsoft 365) won't cut it.
First, you need to create an Azure Maps account in the Azure Portal...
Once you've created your Azure Maps account, you'll need to create a new App Registration within the Entra Admin Center. This will allow you to authenticate against the Azure Maps account and provide you with access to the Azure Maps APIs. You may need the help of your Global Admin to complete this.
Creating the Entra App Registration
- Head to the Entra Admin Center (https://entra.microsoft.com).
- In the left sidebar, head to Identity > Applications > App Registrations.
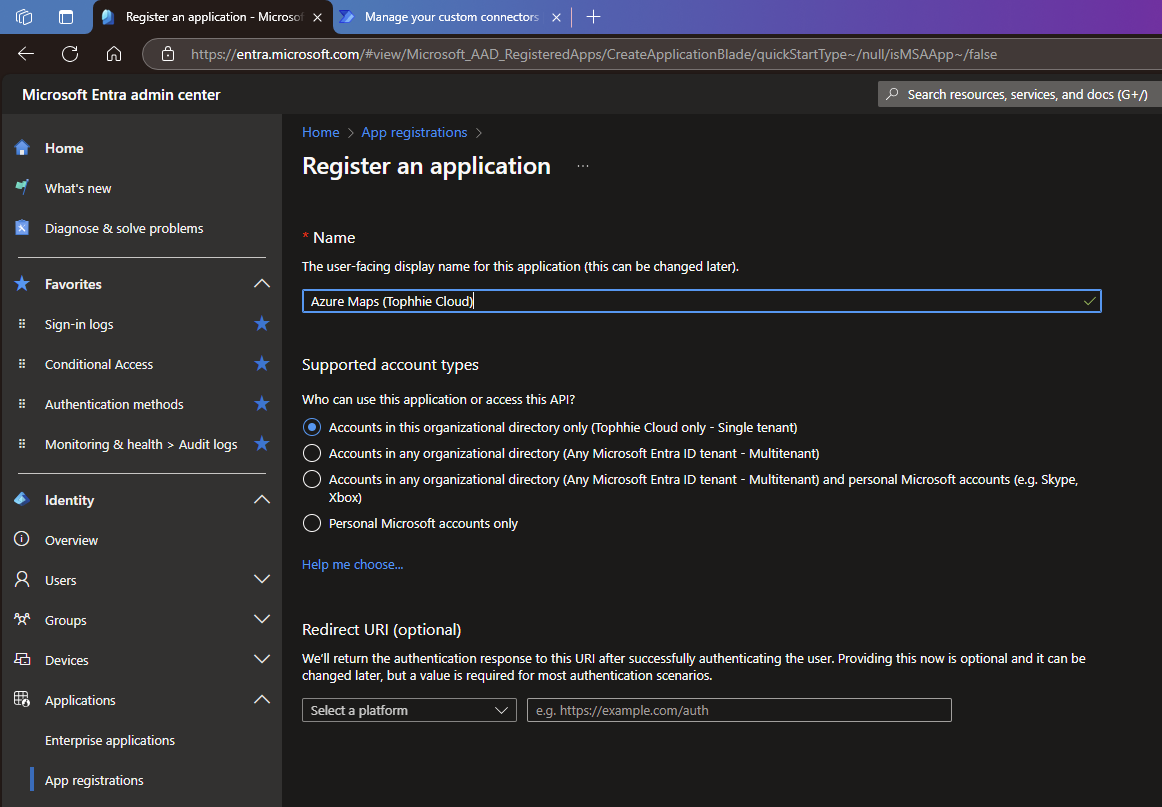
- Click "New registration".
- Give your app a recognisable name. We've gone for "Azure Maps (Tophhie Cloud)", and make sure the supported account types is set to "single tenant".
- Once that's done, you'll be shown your new app registration, head to "Certificates & secrets" and generate a new "client secret".
- Set the duration for as long as you think is necessary, and keep a note of the secret value somewhere. We'll need it for later.
- Head to "API permissions", click "Add a permission", go to "APIs my organization uses" and search "Azure Maps".
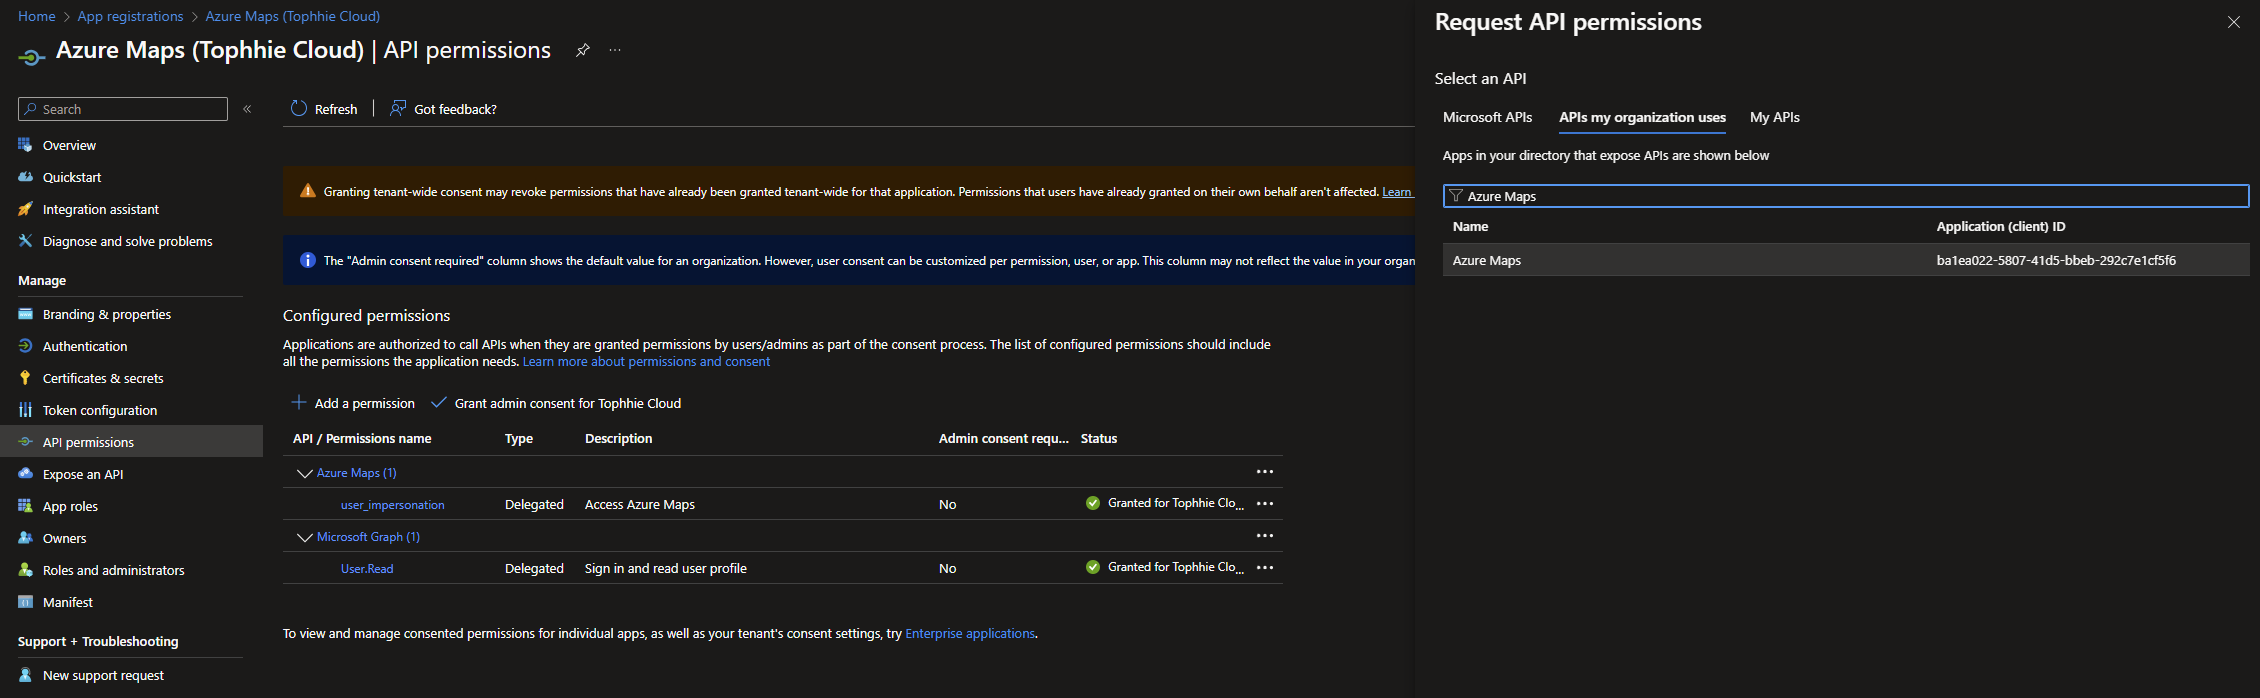
- Select it, check "user_impersonation" and click "Add permissions".
- Click "Grant admin consent for {tenant name}".
- Your API permissions should now look like this.

We're done with the Entra application for now, but we'll be back later.
Provide API access to the Azure Maps account
From the Azure Portal, open the Azure Maps account you created earlier. We need to assign some roles/permissions so you can use the API.
- Open the Azure Maps account.
- Go to "Access control (IAM)".
- Click "Add" > "Add role assignment".
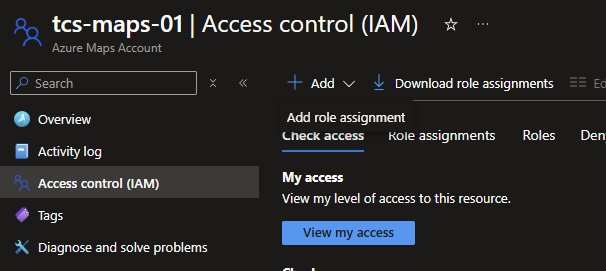
- We're going to go with "least privilege" for this one, as we're not performing any write operations. So, select "Azure Maps Data Reader". Click "Next"
- In the "Members" tab, add your account (or the account you intend to use within Power Automate).
- Click "Next" then "Review + assign".
You'll now notice the account you provided access to shows up in the "Role assignments" tab, with the permissions you specified.
Create the Custom Connector in Power Automate
Now we're going to hook up Power Automate to Azure Maps. Unfortunately, Microsoft hasn't provided their own official connector into Azure Maps, so we need to create this ourselves.
- Go to Power Automate (https://make.powerautomate.com).
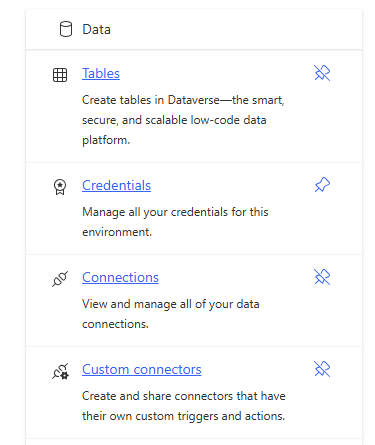
- In the left sidebar, go to "More" > "Discover All" > then "Custom Connectors" underneath the Data table.
- Click "New custom connector" > "Create from blank".
- Give your customer connector a name, we went simple, "Azure Maps". Then click "Continue".
- Toggle the "Swagger editor" to on.
- For this part, I'm going to provide you with the full Swagger file, so you don't need to manually configure everything.
- Copy and paste the below into the Swagger editor, replacing everything.
swagger: '2.0'
info:
  title: Azure Maps
  description: ''
  version: '1.0'
host: atlas.microsoft.com
basePath: /
schemes:
  - https
consumes: []
produces: []
paths:
  /route/directions/json:
    get:
      responses:
        '200':
          description: default
          schema:
            type: object
            properties:
              formatVersion:
                type: string
                description: formatVersion
              routes:
                type: array
                items:
                  type: object
                  properties:
                    summary:
                      type: object
                      properties:
                        lengthInMeters:
                          type: integer
                          format: int32
                          description: lengthInMeters
                        travelTimeInSeconds:
                          type: integer
                          format: int32
                          description: travelTimeInSeconds
                        trafficDelayInSeconds:
                          type: integer
                          format: int32
                          description: trafficDelayInSeconds
                        trafficLengthInMeters:
                          type: integer
                          format: int32
                          description: trafficLengthInMeters
                        departureTime:
                          type: string
                          description: departureTime
                        arrivalTime:
                          type: string
                          description: arrivalTime
                      description: summary
                    legs:
                      type: array
                      items:
                        type: object
                        properties:
                          summary:
                            type: object
                            properties:
                              lengthInMeters:
                                type: integer
                                format: int32
                                description: lengthInMeters
                              travelTimeInSeconds:
                                type: integer
                                format: int32
                                description: travelTimeInSeconds
                              trafficDelayInSeconds:
                                type: integer
                                format: int32
                                description: trafficDelayInSeconds
                              trafficLengthInMeters:
                                type: integer
                                format: int32
                                description: trafficLengthInMeters
                              departureTime:
                                type: string
                                description: departureTime
                              arrivalTime:
                                type: string
                                description: arrivalTime
                            description: summary
                          points:
                            type: array
                            items:
                              type: object
                              properties:
                                latitude:
                                  type: number
                                  format: float
                                  description: latitude
                                longitude:
                                  type: number
                                  format: float
                                  description: longitude
                            description: points
                      description: legs
                    sections:
                      type: array
                      items:
                        type: object
                        properties:
                          startPointIndex:
                            type: integer
                            format: int32
                            description: startPointIndex
                          endPointIndex:
                            type: integer
                            format: int32
                            description: endPointIndex
                          sectionType:
                            type: string
                            description: sectionType
                          travelMode:
                            type: string
                            description: travelMode
                      description: sections
                description: routes
      summary: Get Directions
      description: Get directions between two locations
      operationId: Get-Directions
      parameters:
        - name: query
          in: query
          required: true
          type: string
          description: >-
            The Coordinates through which the route is calculated, delimited by
            a colon. A minimum of two coordinates is required. The first one is
            the origin and the last is the destination of the route. Optional
            coordinates in-between act as WayPoints in the route. You can pass
            up to 150 WayPoints.
          x-ms-summary: Query
          x-ms-visibility: important
        - name: x-ms-client-id
          in: header
          required: true
          type: string
          default: {{REPLACE THIS VALUE}}
          x-ms-visibility: internal
definitions: {}
parameters: {}
responses: {}
securityDefinitions:
  oauth2-auth:
    type: oauth2
    flow: accessCode
    tokenUrl: https://login.windows.net/common/oauth2/authorize
    scopes: {}
    authorizationUrl: https://login.microsoftonline.com/common/oauth2/authorize
security:
  - oauth2-auth: []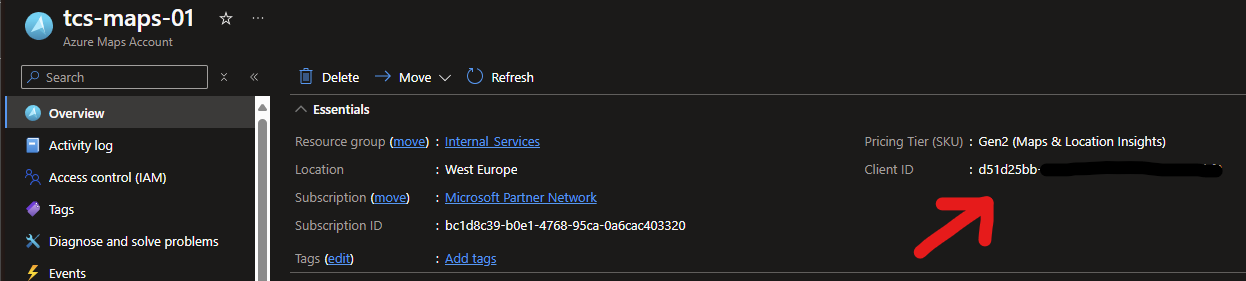
tags: []- On line 142, you need to replace the value for "default" with the client ID of your Azure Maps account. You can get this on the "Overview" tab when viewing the Azure Maps account, it's listed under "Client ID".
- Once you've done that, toggle the "Swagger editor" back to off.
- Then, go to the "Security" tab.
- Remember that Entra application we created earlier, we need a little bit of information from it.
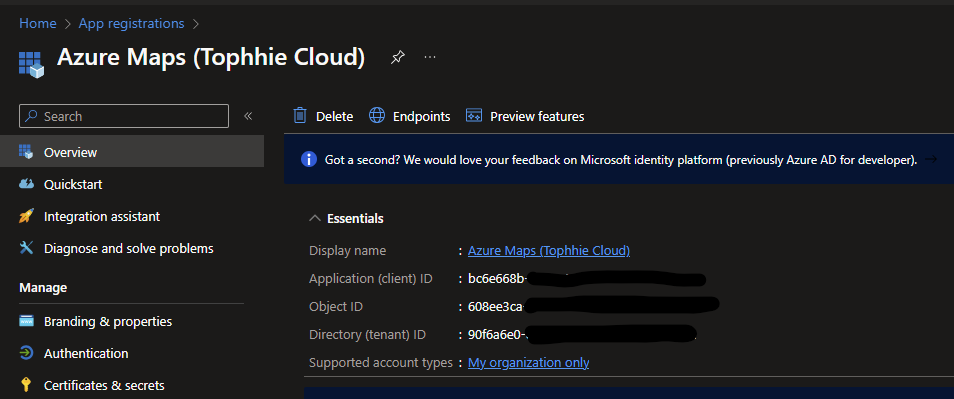
- Go back to the App Registration, and make a note of the following:
- Application (client) ID
- Directory (tenant) ID
- The client secret value from earlier
- If you've lost it, go back to "Certificates & secrets", delete the one you created, and just create a new one, making a note of the "value".
- Go back to the App Registration, and make a note of the following:
- On the Security tab:
- Enter the Application (client) ID into the "Client ID" field.
- Enter the client secret value into the "Client secret" field.
- Enter the Directory (tenant) ID into the "Tenant ID" field.
- In the "Resource URL" field, enter https://atlas.microsoft.com/.
- Click "Update Connector".
- This then saves your custom connector, and you'll be provided with a "Redirect URL" under the "Security" tab. Copy and make a note of that somewhere.

Update the Entra App Registration
Now you've finished creating the Custom Connector, we need to go back to the App Registration and make sure we can authenticate against it.
- Go back to the App Registration in Entra.
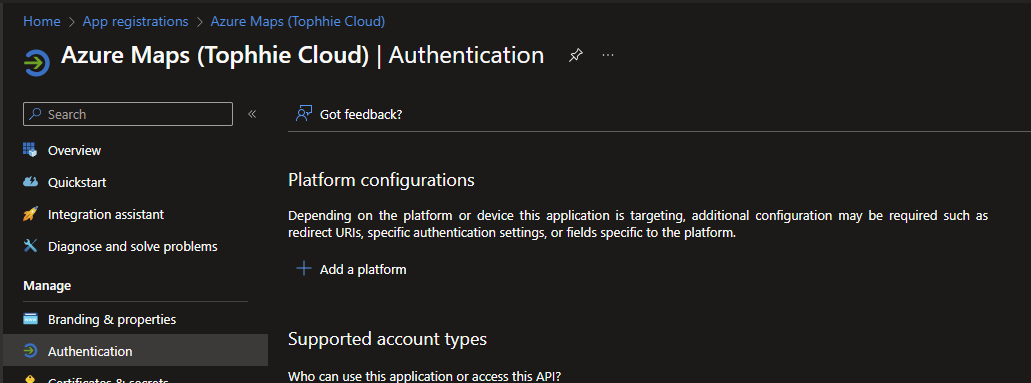
- Go to "Manage" > "Authentication" in the sidebar.
- Click "Add a platform".
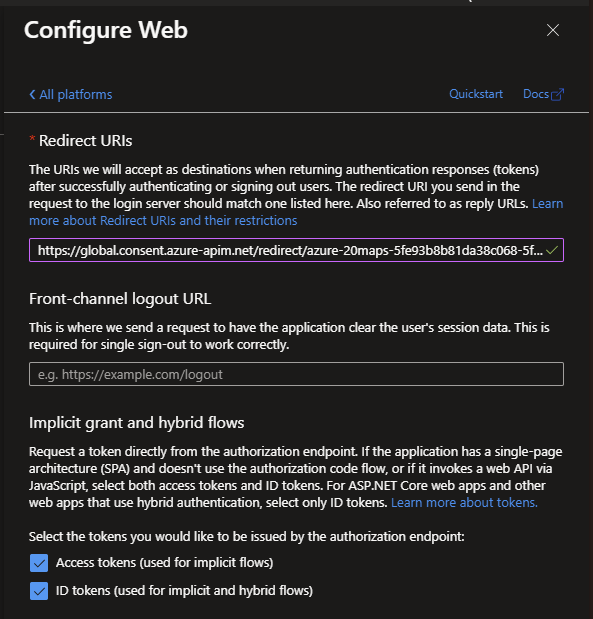
- Select "Web".
- Paste the "Redirect URL" you got from the Custom Connector into the field under "Redirect URIs".
- Check "Access tokens" and "ID tokens".
- Then click "Configure".
Create a connection to Azure Maps in Power Automate
Now we have the authentication set up, and the custom connector set up, we now need to create a connection to the Azure Maps service. Luckily, this is really easy.
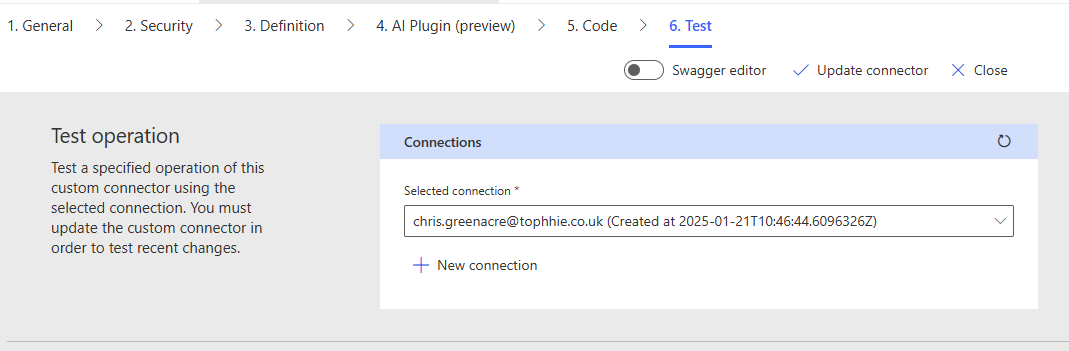
- If you haven't come out of the Custom Connector creation/editor page, head to the "Test" tab. If you have come out of it, go back to "Custom Connector" and edit your Azure Maps connector.
- Click "New connection" under the "Test operation" section.
- Authenticate.
- Done.
Whilst you're on the "Test" tab, feel free to test out the "Get-Directions" operation by specifying the following into the query field. This is the coordinates from Buckingham Palace to 10 Downing Street separated by a colon.
51.501364,-0.1444649:51.5033998,-0.1303014Once you've clicked "Test Operation" you should get a status 200 response, with the JSON data for that route. You may notice it's the "summary" object we're most interested in, specifically the "travelTimeInSeconds" and "arrivalTime" properties.
Create your Flow
Now we're ready to interact with Azure Maps and get our commute information.
- In Power Automate, head to "My flows".
- Click "New flow" > then "Scheduled cloud flow".
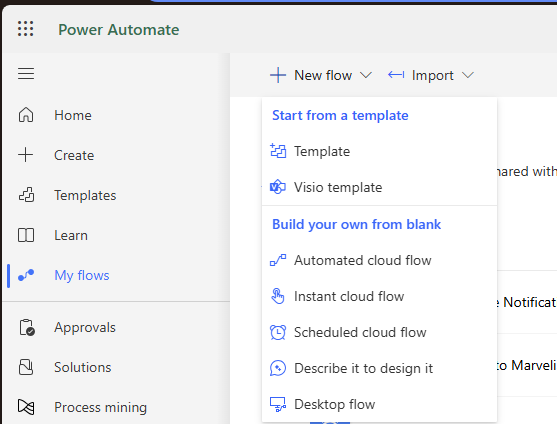
- Give your Flow a name, and set how often you want this to repeat. Then click "Create".
- Below shows a rough view of my Flow.
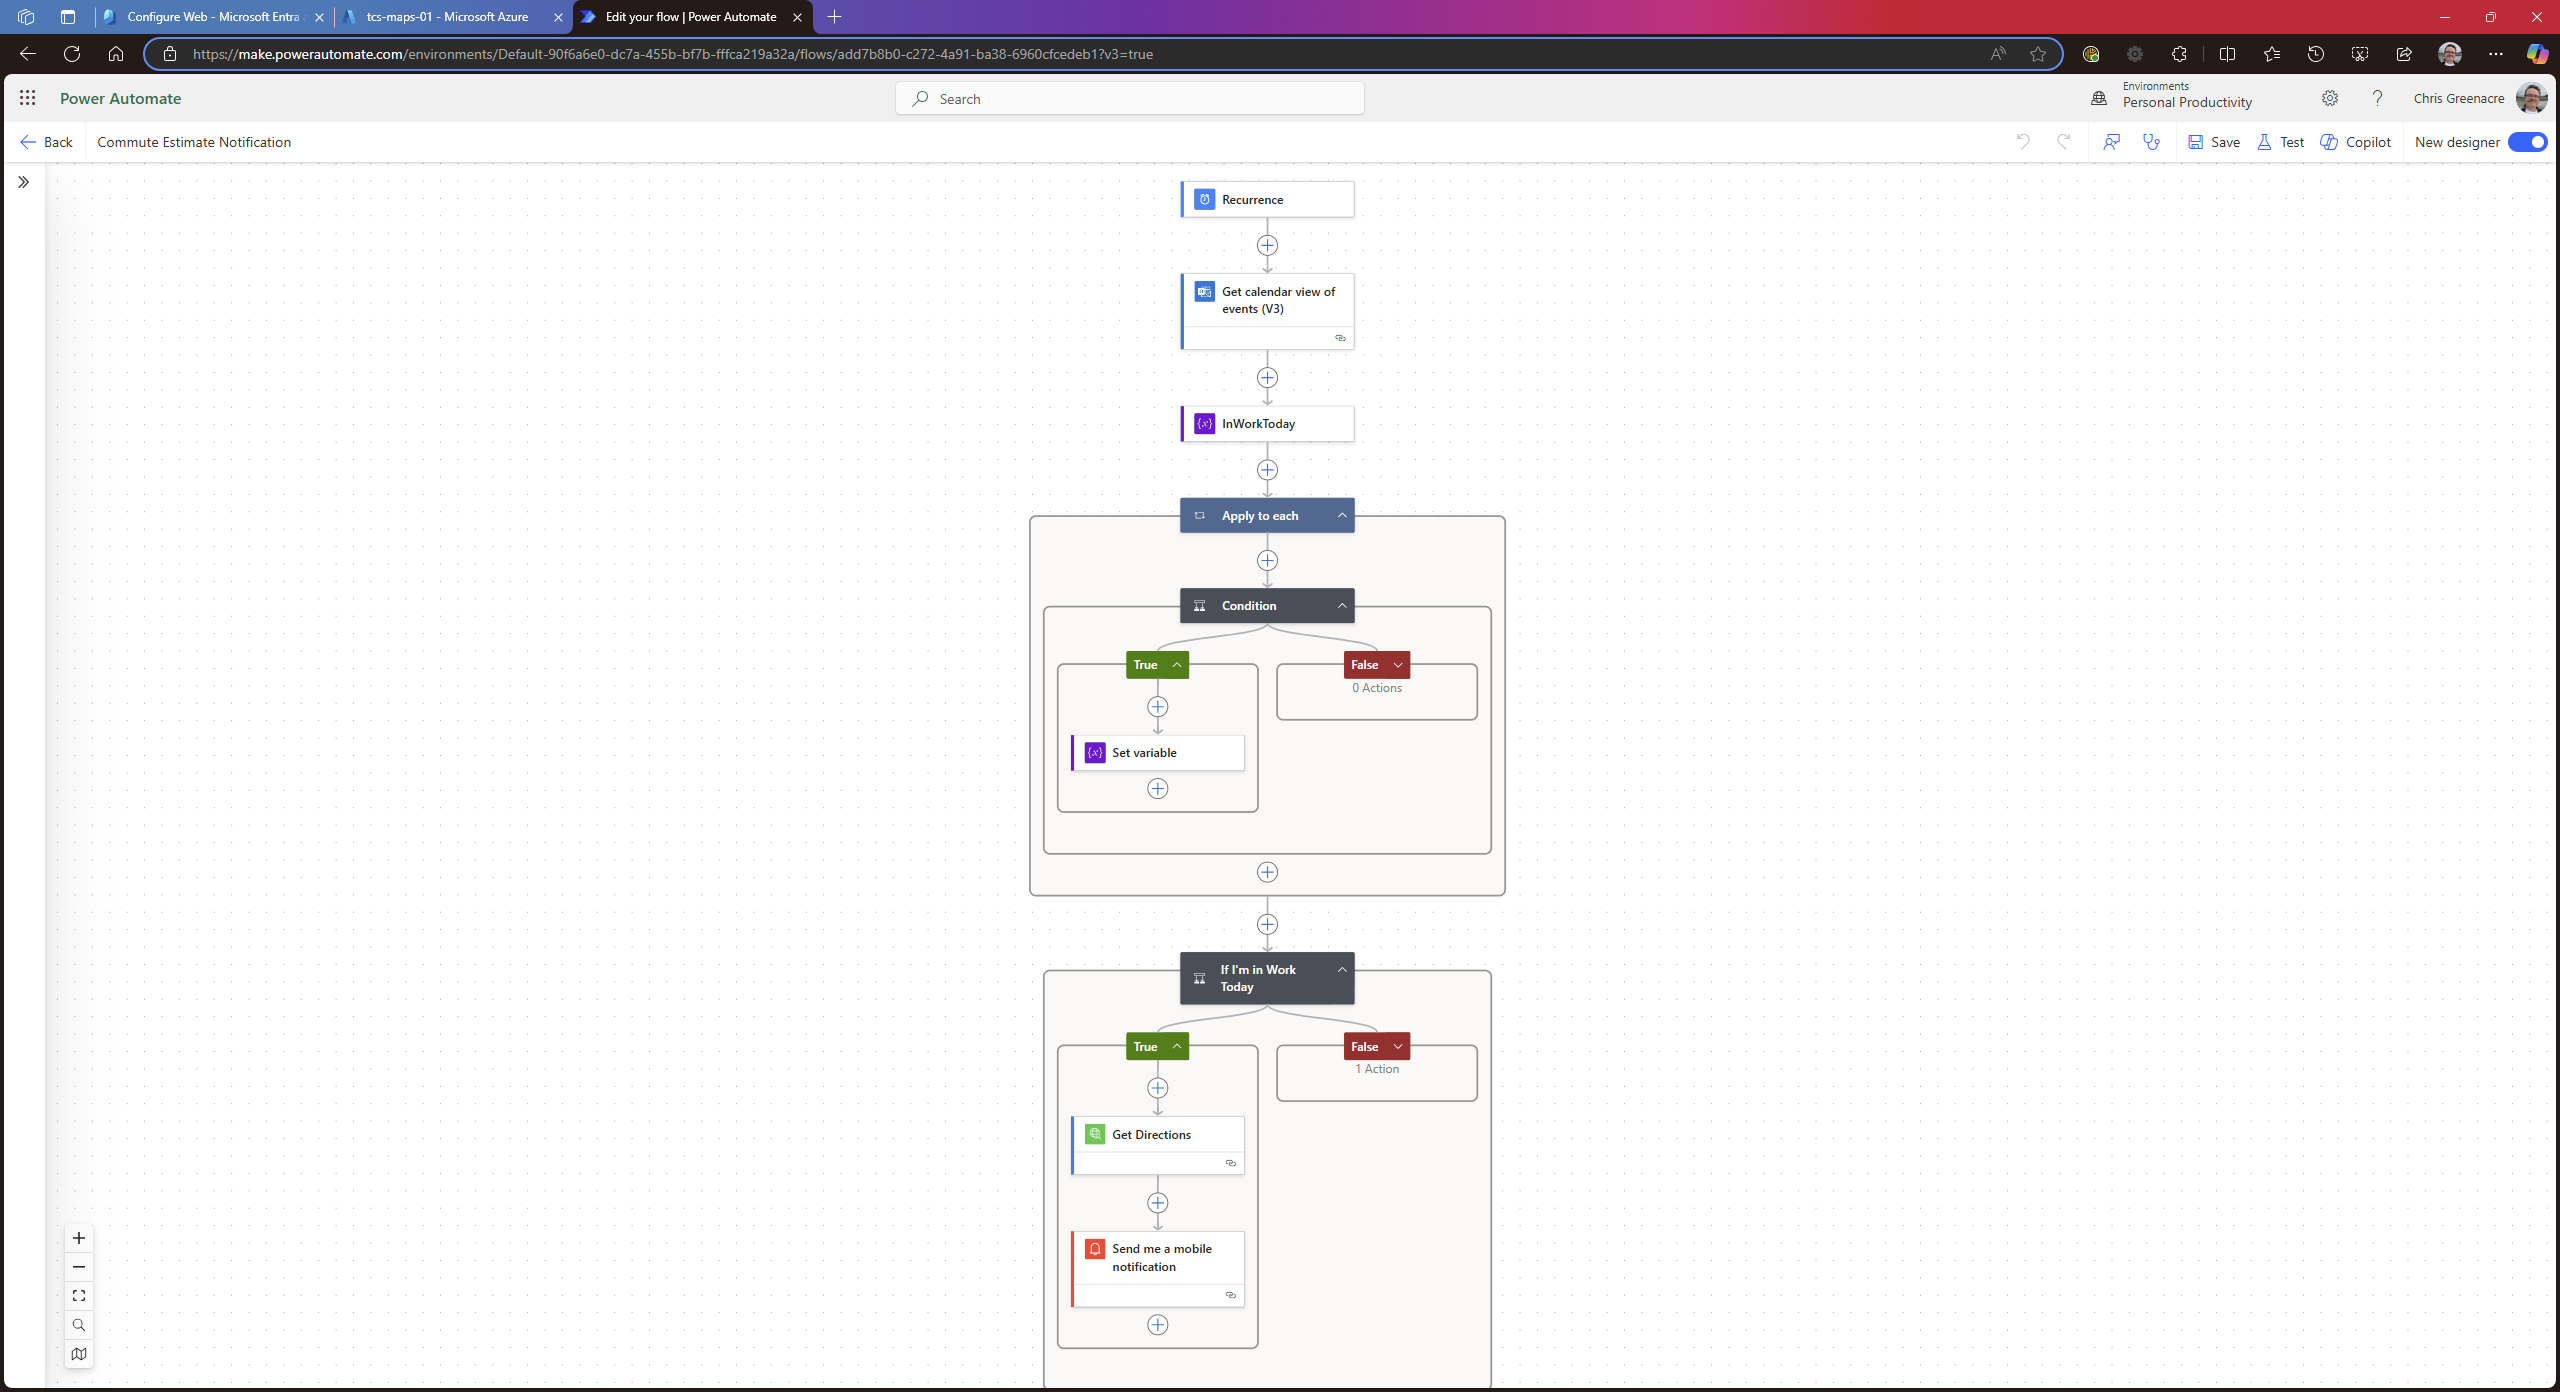
Here's how I have my Flow configured:
- Every day at 7.30 am.
- Get a calendar view of my events for today.
- The action filters Calendar Id to my personal Outlook calendar, Start Time to utcNow() and End Time to addHours(utcNow(), 10).
- Then initialise a variable called "InWorkToday" and set to false.
- The Flow then loops through all the events in my calendar, returned from the calendar view action.
- For each event in that array, check if the event subject is equal to "Working from the Office", if true, set the "InWorkToday" variable to true.
- Then check the "InWorkToday" variable.
- If its value is true, use the Custom Connector to get the route between my home, and my workplace.
- When you add the "Get Directions" action from your custom connector, you'll be asked to provide a query. Specify the latitude and longitude of your start and end destinations, separated by a colon.
- For example, if I was going from Buckingham Palace to 10 Downing Street the query would be: 51.501364,-0.1444649:51.5033998,-0.1303014
- Sorry, I'm not going to put my actual home address or office location in here.
- When you add the "Get Directions" action from your custom connector, you'll be asked to provide a query. Specify the latitude and longitude of your start and end destinations, separated by a colon.
- Then, send a custom push notification to all mobile devices I have Power Automate installed on with the following message:
- Hi Chris, it looks like it's going to take about {X} minutes to get to work today, with an estimated arrival time of {X} AM/PM.
- The first {X} function is: div(first(outputs('Get_Directions')?['body/routes'])?['summary']?['travelTimeInSeconds'], 60)
- The second {X} function is: formatDateTime(first(outputs('Get_Directions')?['body/routes'])?['summary']?['arrivalTime'], 'hh:mm tt')
- Hi Chris, it looks like it's going to take about {X} minutes to get to work today, with an estimated arrival time of {X} AM/PM.
- If its value is true, use the Custom Connector to get the route between my home, and my workplace.

You could, if you wanted to, get the Flow to send you an email, or a Teams message. Have a play around and see what works for you. But for me, a simple push notification does the job just fine!
Let me know what you think! I know it is incredibly involved this tutorial, and there's easier ways of doing this, but why go with what's easy, right? 🙂


