
Monitor the Exchange Online Managed Folder Assistant with PowerShell
The Managed Folder Assistant in Exchange is responsible for applying and processing message retention settings your admin has configured in retention policies. Let's check to see when the MFA ran across our organisation...

The script will provide a TXT file to a chosen email address, listing all Exchange Online mailboxes and the following Managed Folder Assistant results.
- Last Processing Date/Time
- Items Deleted
- Items Tagged as Expired
- Items Moved to Online Archive
Note: if you already have an Azure Automation account set up with access to Microsoft Graph and Exchange, you can skip this section and head to "Configuring the PowerShell script".
Setting up the Azure Automation environment
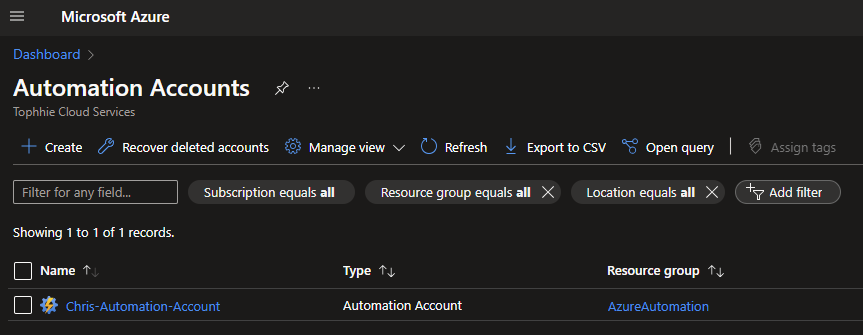
To start, you'll need to make sure you have an Azure subscription available for you to use, and you'll need to have set up an Automation Account. We already have one set up and ready to go, but if you need a little help getting this going, you can refer to this Microsoft Learn article.
Now you have an Automation Account, we need to give it permissions to access Microsoft Graph and Exchange Online.
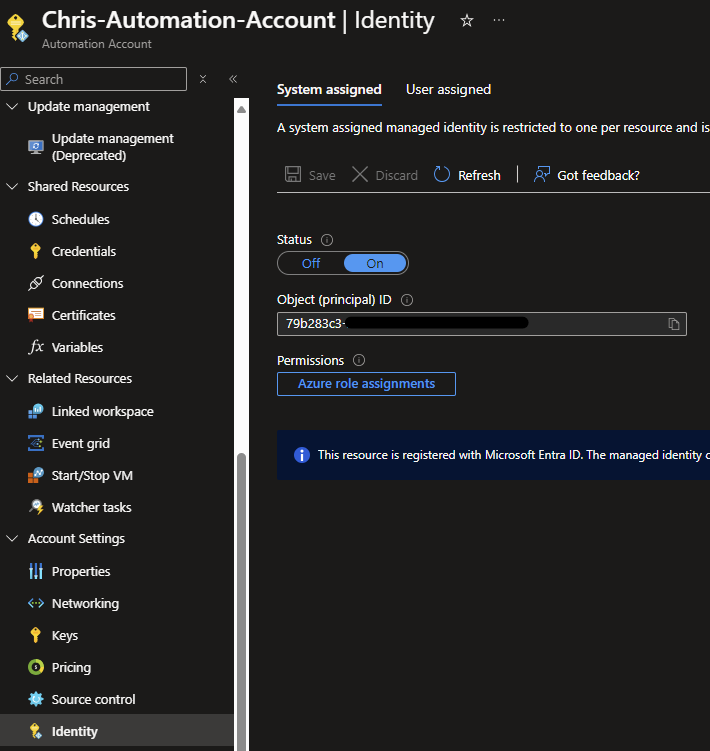
Head to Account Settings > Identity to start, under "System assigned", set the status to "On". This will then create a System Managed Identity, that we'll be able to configure with access to Graph and Exchange.
Make a note of the "Object (principal) ID", we'll need that shortly.
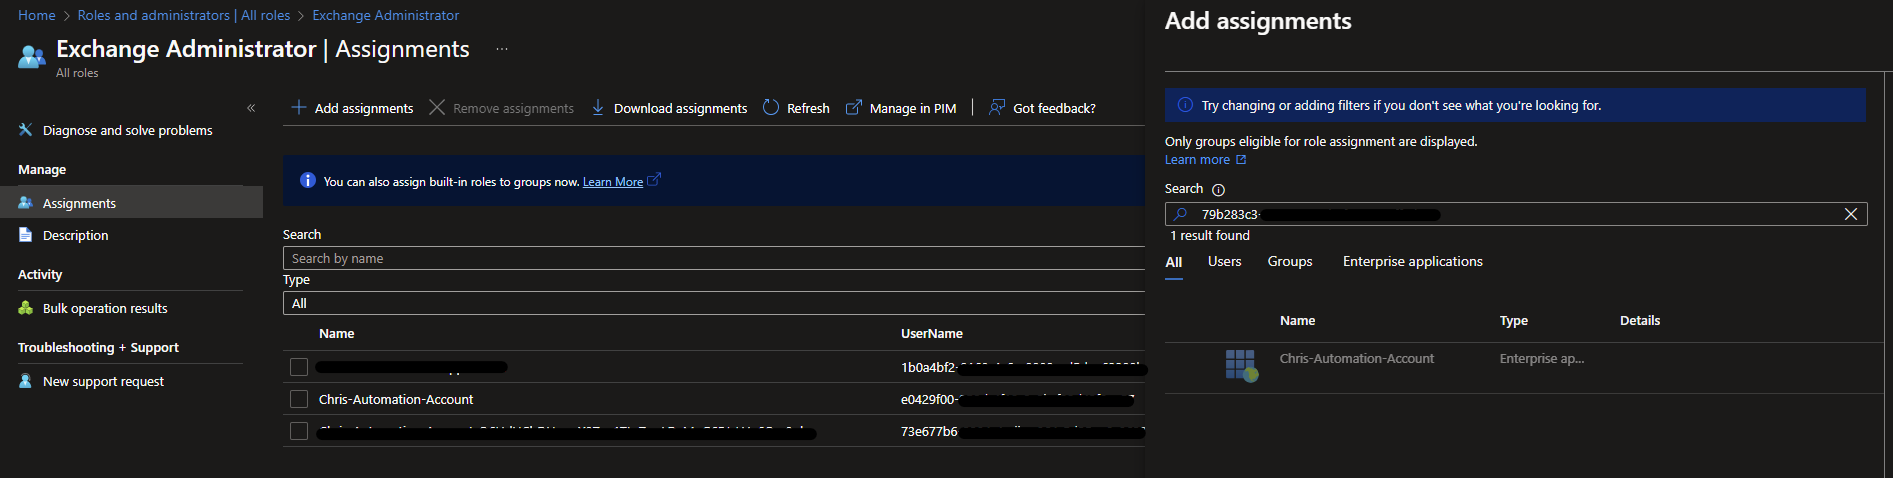
Head to the Microsoft Entra admin center at entra.microsoft.com, go to Identity > Show more > Roles & admins > Roles & admins, then select "Exchange Administrator". Click "Add assignments", and paste the Object (principal) ID into the search field. Select the enterprise application, and click "Add".
Now we need to provide the API permissions, for this we'll open a PowerShell window, and connect to Microsoft Graph.
Connect to Microsoft Graph with the following command.
Connect-MgGraph -Scopes "AppRoleAssignment.ReadWrite.All","Application.Read.All"Once connected, run the following commands to assign Exchange Exchange.ManageAsApp API permissions, and Graph Mail.Send permissions.
Run the following command to assign the Graph permissions.
$ManagedIdentity = Get-MgServicePrincipal -ServicePrincipalId {REPLACE WITH OBJECT PRINCIPAL ID}
$GraphApp = Get-MgServicePrincipal -Filter "AppId eq '00000003-0000-0000-c000-000000000000'"
$Role = $GraphApp.AppRoles | Where-Object {$_.Value -eq 'Mail.Send'}
$AppRoleAssignment = @{
    "PrincipalId" = $ManagedIdentity.Id
    "ResourceId" = $GraphApp.Id
    "AppRoleId" = $Role.Id
}
New-MgServicePrincipalAppRoleAssignment -ServicePrincipalId $ManagedIdentity.Id -BodyParameter $AppRoleAssignment
Now we'll do the same, but for the Exchange API permissions.
$ManagedIdentity = Get-MgServicePrincipal -ServicePrincipalId {REPLACE WITH OBJECT PRINCIPAL ID}
$ExchangeApp = Get-MgServicePrincipal -Filter "AppId eq '00000002-0000-0ff1-ce00-000000000000'"
$Role = $ExchangeApp.AppRoles | Where-Object {$_.Value -eq 'Exchange.ManageAsApp'}
$AppRoleAssignment = @{
    "PrincipalId" = $ManagedIdentity.Id
    "ResourceId" = $ExchangeApp.Id
    "AppRoleId" = $Role.Id
}
New-MgServicePrincipalAppRoleAssignment -ServicePrincipalId $ManagedIdentity.Id -BodyParameter $AppRoleAssignment
And that's the permissions configured!
Now we need to make sure we have a valid Runtime Environment configured, with all the necessary PowerShell modules installed. Head back to your Automation Account and go to Process Automation > Runtime Environments (Preview), to get started.
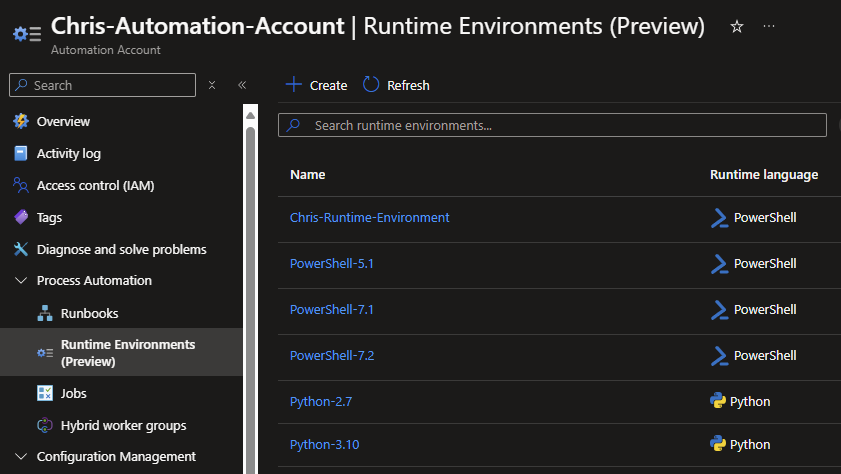
When creating your Runtime Environment, make sure your Language is set to PowerShell, and your Runtime version is set to any version equal to 5.1 or higher.
Tip: we prefer version 7.2.
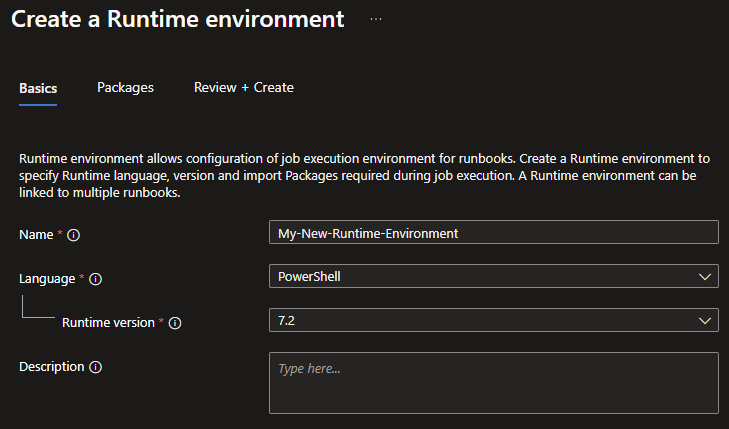
You'll need the following packages installed in that Runtime Environment:
- Microsoft.Graph.Authentication
- Microsoft.Graph.Mail
- Microsoft.Graph.Users
- Microsoft.Graph.Users.Actions
- ExchangeOnlineManagement
As of the time of publishing, our Microsoft.Graph modules are at version 2.22.0, and our ExchangeOnlineManagement module is at version 3.5.0.
Once your Runtime Environment is all set up, and your modules are listed as "Available", you're ready!
Configuring the PowerShell script
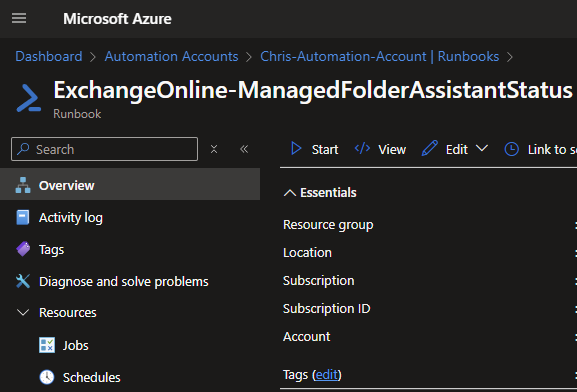
Head on over to Process Automation > Runbooks to start.
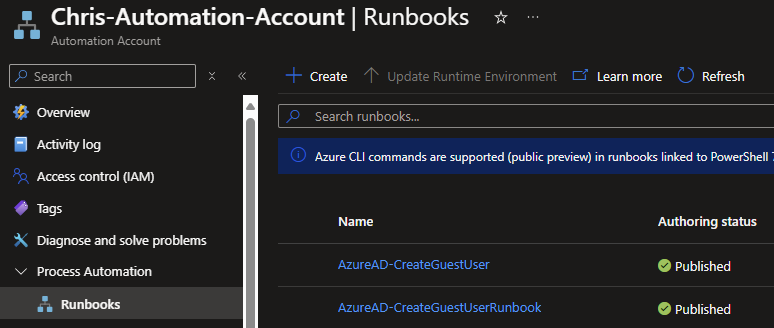
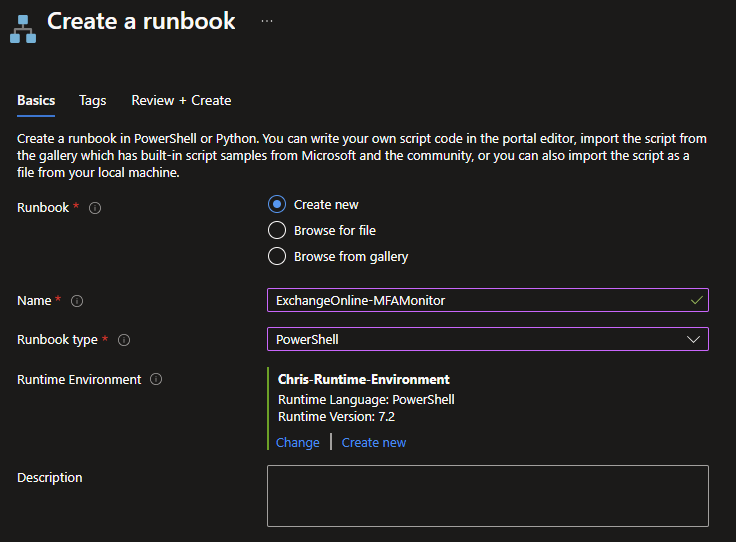
Create a new runbook, provide it with any descriptive name you like, and set the runbook type to be "PowerShell". You'll then be prompted to specify your runtime environment (this is the one we set up earlier), click "Select from existing", and select the runtime environment you created. Then click "Review + Create", then "Create".
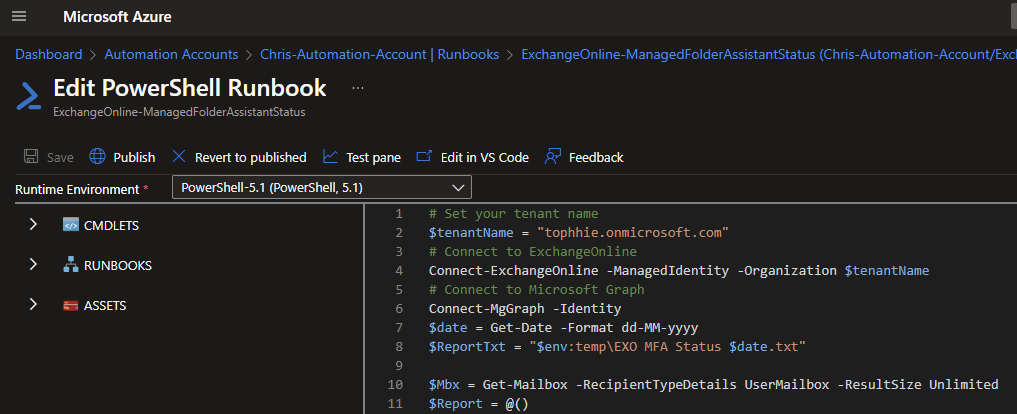
You'll be taken to the editor, where you can input your PowerShell script. Copy and paste the below into that editor. You'll need to fill in some of your own details into the script.
# Set your tenant name
$tenantName = "{REPLACE WITH YOUR TENANT DOMAIN NAME}"
$SenderEmail = "{REPLACE WITH YOUR SENDER ADDRESS}"
# Connect to ExchangeOnline
Connect-ExchangeOnline -ManagedIdentity -Organization $tenantName
# Connect to Microsoft Graph
Connect-MgGraph -Identity
$date = Get-Date -Format dd-MM-yyyy
$ReportTxt = "$env:temp\EXO MFA Status $date.txt"
$Mbx = Get-Mailbox -RecipientTypeDetails UserMailbox -ResultSize Unlimited
$Report = @()
ForEach ($M in $Mbx) {
$LastProcessed = $Null
Write-Host "Processing" $M.DisplayName
$Log = Export-MailboxDiagnosticLogs -Identity $M.Alias -ExtendedProperties
$xml = [xml]($Log.MailboxLog)
$LastProcessed = ($xml.Properties.MailboxTable.Property | ? {$_.Name -like "*ELCLastSuccessTimestamp*"}).Value
$ItemsDeleted = $xml.Properties.MailboxTable.Property | ? {$_.Name -like "*ElcLastRunDeletedFromRootItemCount*"}
$ItemsTaggedAsExpired = $xml.Properties.MailboxTable.Property | ? {$_.Name -like "*ElcLastRunTaggedWithExpiryItemCount*"}
$ItemsMovedToArchive = $xml.Properties.MailboxTable.Property | ? {$_.Name -like "*ElcLastRunArchivedFromRootItemCount*"}
If ($LastProcessed -eq $Null) {
$LastProcessed = "Not processed"}
$ReportLine = [PSCustomObject]@{
User = $M.DisplayName
LastProcessed = $LastProcessed
ItemsDeleted = $ItemsDeleted.Value
ItemsTaggedAsExpired = $ItemsTaggedAsExpired.Value
ItemsMovedToOnlineArchive = $ItemsMovedToArchive.Value}
$Report += $ReportLine
}
$Report = $Report | Select User, LastProcessed, ItemsDeleted, ItemsTaggedAsExpired, ItemsMovedToOnlineArchive
$Report | Out-File -FilePath $ReportTxt
$base64attachment = [Convert]::ToBase64String([IO.File]::ReadAllBytes($ReportTxt))
$params = @{
Message = @{
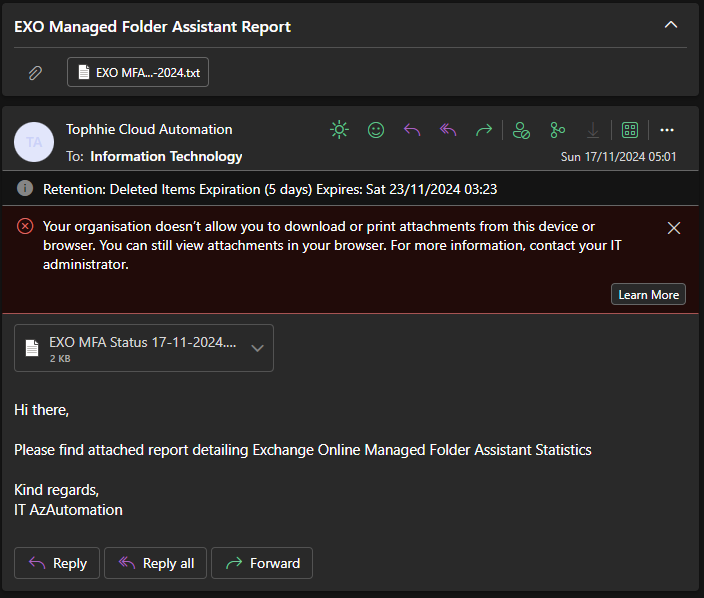
Subject = "EXO Managed Folder Assistant Report"
Body = @{
ContentType = "Text"
Content = "Hi there,
Please find attached report detailing Exchange Online Managed Folder Assistant Statistics
Kind regards,
Azure Automation"
}
ToRecipients = @(
@{
EmailAddress = @{
Address = "{REPLACE WITH YOUR RECIPIENT ADDRESS}"
}
}
)
Attachments = @(
@{
"@odata.type" = "#microsoft.graph.fileAttachment"
Name = "EXO MFA Status $date.txt"
ContentType = "text/plain"
ContentBytes = "$base64attachment"
}
)
}
SaveToSentItems = "false"
}
Send-MgUserMail -UserId $SenderEmail -BodyParameter $paramsOnce you've copied all that in, and filled in the placeholders with your own tenant information, click "Save", then "Publish".
This will take you back to the runbook overview, where you can manually run the script. Click "Start" to run the script now and get the report sent to you immediately.
If you want this report to be sent to you periodically, you can configure a schedule under Resources > Schedules. That way you can receive your report hourly, daily, weekly, monthly... as frequent or as infrequent as you like!
It's worth noting, the Managed Folder Assistant can take up to 7 days to run on a mailbox, so setting a schedule any more frequent than once a week, may be futile.
You'll then receive a periodic report, outlining the state of the Managed Folder Assistant across all your Exchange Online mailboxes.

We hope this script will help you troubleshoot any Exchange Online MFA issues you might be having or provide a little more insight into the inner workings of your mailboxes and how your retention policies are doing!
I'm always happy to assist you with setting up and configuring any of my provided scripts, and solutions, so if you have any issues or any queries, please do drop me an email at chris.greenacre@tophhie.co.uk.
Until next time 👋


